
Are you tracking your results online? Setting up Google Analytics 4 (GA4) is essential for understanding how users interact with your website and making decisions to grow your home service business. GA4 offers advanced tracking and analysis tools that are particularly beneficial for businesses looking to optimize and track their search engine optimization efforts.
I’ve put together a step-by-step guide to help home services businesses set up Google Analytics and start tracking their website performance. This guide covers the basic setup to get you started today:
Step 1: Create a GA4 Property or Account
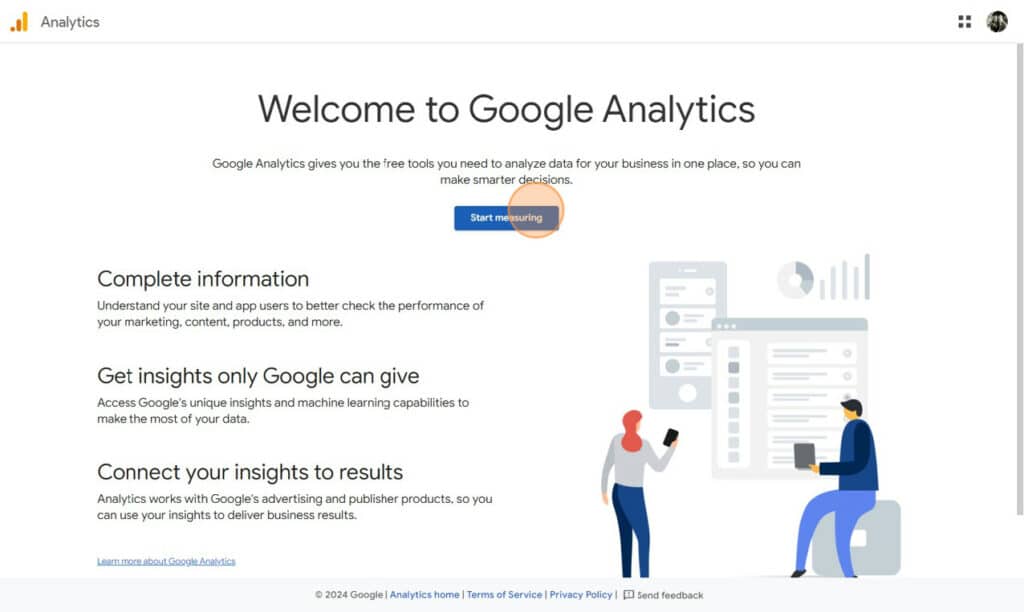
To get started, log in to your Google Analytics account and navigate to the Admin panel. If you don’t have a Google Analytics account start by clicking “Start Measuring” on the homepage. Here’s how to create a new GA4 property:
Access Admin Panel: Click on the gear icon in the bottom-left corner to enter the Admin panel. or click “Start Measuring” if you don’t have an existing analytics account.
New Account
Existing Account

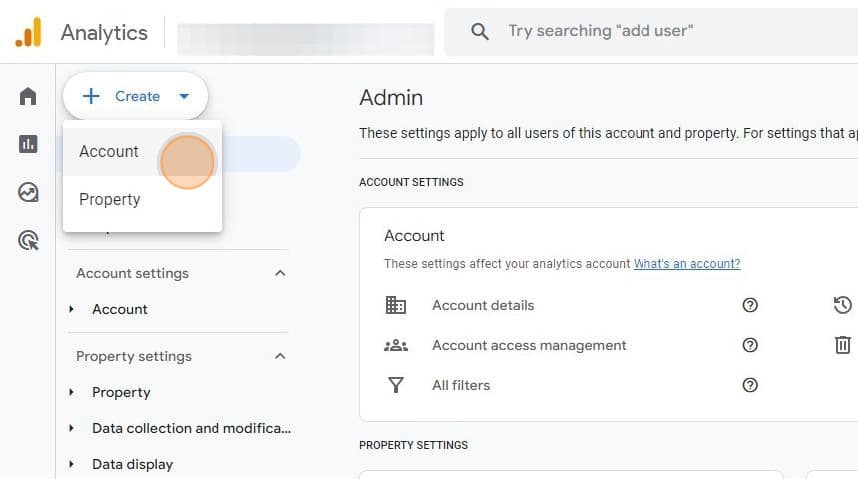
Create a New Account: In the dropdown, click on “Account”. My recommendation is to create an account for each business. If you are setting up a new property under the same business click “Property”.
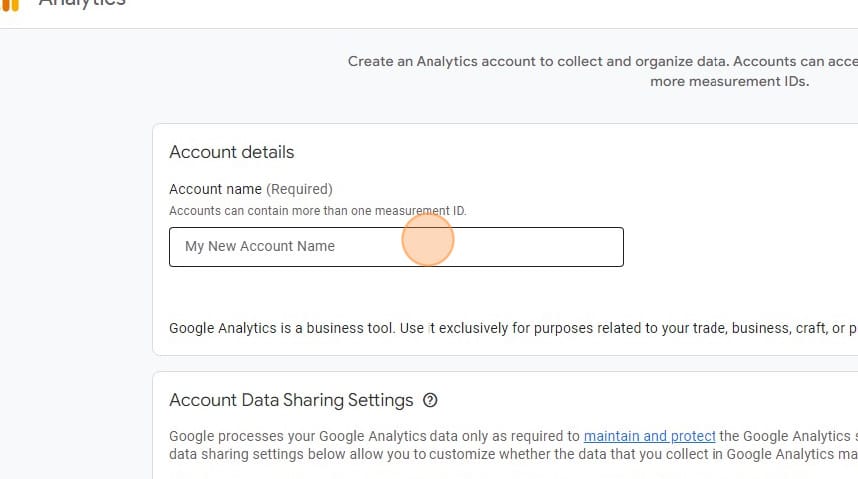
Add Account Information: Once you are through this step, you will begin adding your business information to finish the account setup. Start by adding your business name in the section below. This will help you keep the Analytics account separate from any other accounts you have. Once this information is added, select the “Account Data Sharing Settings” you want. *Note sharing this data is not necessary, but our go-to is usually to leave it as is and move to the next step.
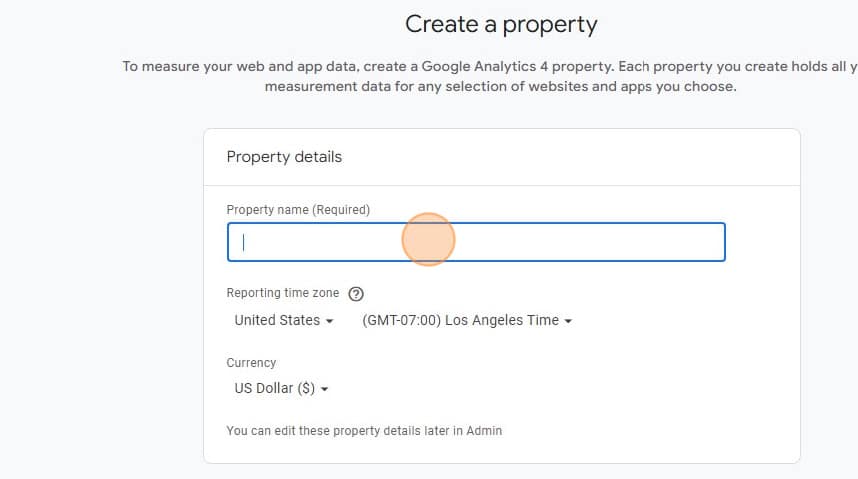
Add Property Information: The next page will be the property. This is specific to the website or application you are tracking. One account can have multiple properties if you have more than one website or application you want to track for the same business. Our go to is to use the domain to identify the property. E.X. “www.nuvogency.com – GA4”. You will also need to set your time zone on this page as that can affect some of the information collected. regarding when users visit your website.
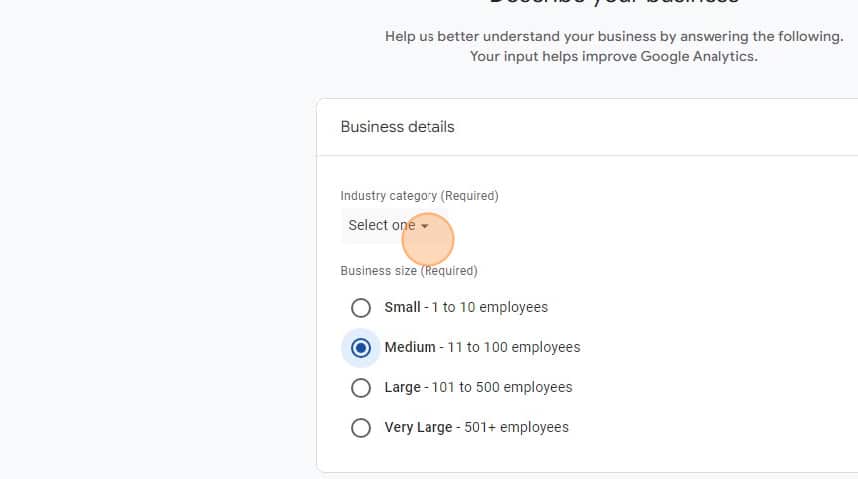
Add Business Details: The next step is to add your business details like category and business size. Some of this is for Google to track some demographics on how and what type of companies use their platform. For industry category we normally choose “Home & Garden” as it is the closest to home services that Google offers.
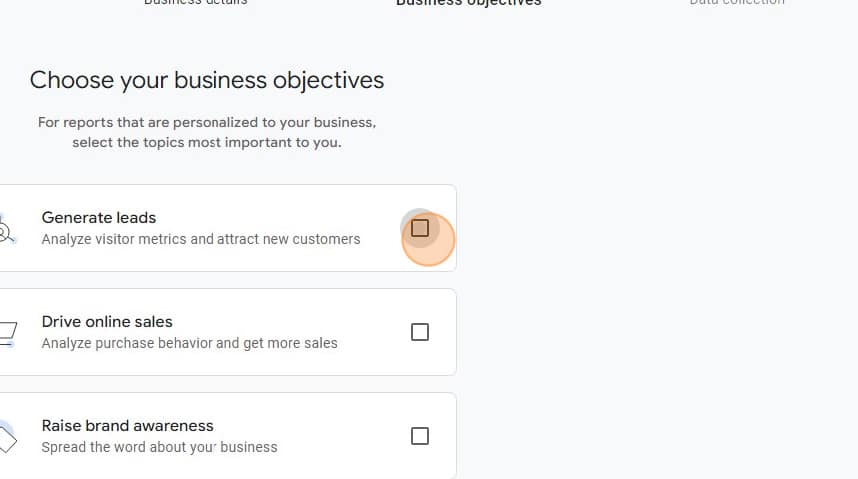
Select Business Objective: The next page will help google auto populate some reports into your analytics accounts. Because GA4 is so customizable it is important to choose the right option to save yourself time on setup. We choose “Generate Leads” as our option as the most common KPI for home service companies is generated leads instead of traffic.
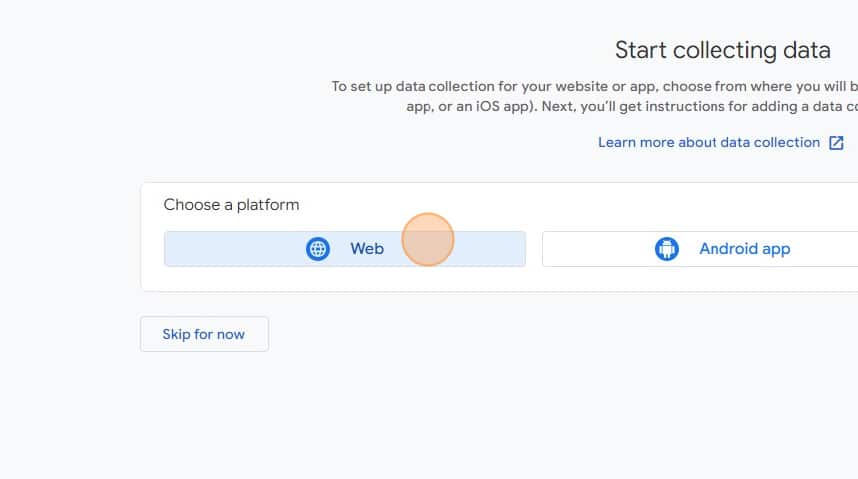
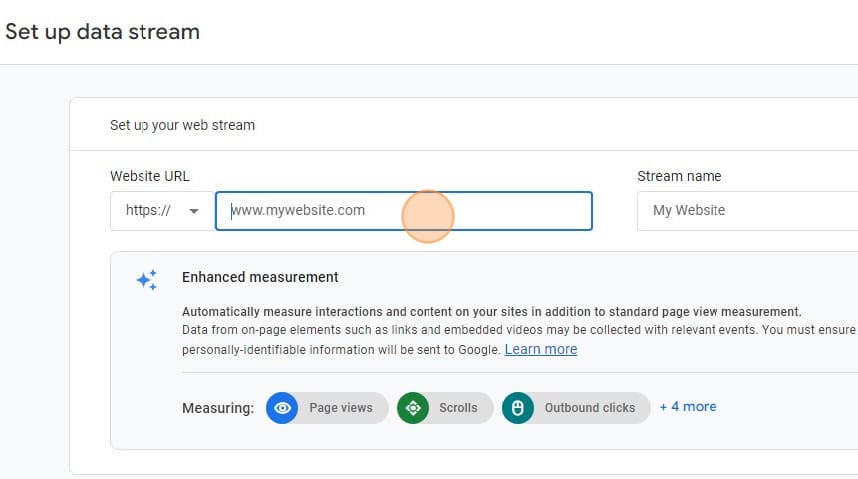
Set Up Your Data Stream: The next section in the setup process has you set up a data stream to tell google where the data you are feeding into analytics is coming from. In most cases selecting “Web” is the correct choice. Once you select web you will need to add additional information for your web stream. Enter your full website url “www.nuvoagnecy.com” with or without the www depending on your setup. and Name the stream “Nuvo Agency Website” so you can identify it if needed later.
I’ve found that in order to maximize the effectiveness of your local listings, it’s important to include accurate information and to keep it up to date if anything changes. Here’s what you should include and how to set them up:
- Business Name, Address, and Phone Number (NAP): Ensure that your business name, address, and phone number are consistent across all listings. This consistency helps search engines verify your business and improves your chances of ranking higher in local search results.
- Business Categories: Choose the most relevant categories for your business. This helps search engines understand what services you offer and matches your listing with relevant search queries.
- Hours of Operation: Keep your business hours updated, including any seasonal changes. Accurate hours help potential customers know when they can reach you and avoid frustration.
- Photos and Videos: Include high-quality images of your business, services, and team. Visual content not only makes your listing more attractive but also helps build trust with potential customers.
- Business Description: Write a clear and concise description of your business, including your services and any unique selling points. Incorporate relevant keywords but keep the text natural and informative.
- Links to Website and Social Media: Include direct links to your website and social media profiles. This drives traffic to your site and allows potential customers to learn more about your business.
- Customer Reviews and Ratings: Encourage satisfied customers to leave reviews. Positive reviews not only enhance your reputation but also play a significant role in local search rankings.
Step 2: Install GA4 Tracking Code
To begin collecting data, you need to install the GA4 tracking code on your website. While adding GA4 tracking directly to your website is possible, we recommend setting it up to track through Google Tag Manager. This will enable you to set up events that can tell you how users are interacting with your site and whether they are taking actions that are generating leads. Below, you will find how to add the GA4 code to your website, but I will cover setting up Google Tag Manager in another article.
- Get Tracking Code: In the Web stream details, you’ll find the “Global Site Tag” (gtag.js) code.
- Add Code to Website: Copy this code and paste it into the HTML of every page on your website, just after the opening <head> tag. If you’re using Google Tag Manager, you can add this code via the Tag Manager interface.
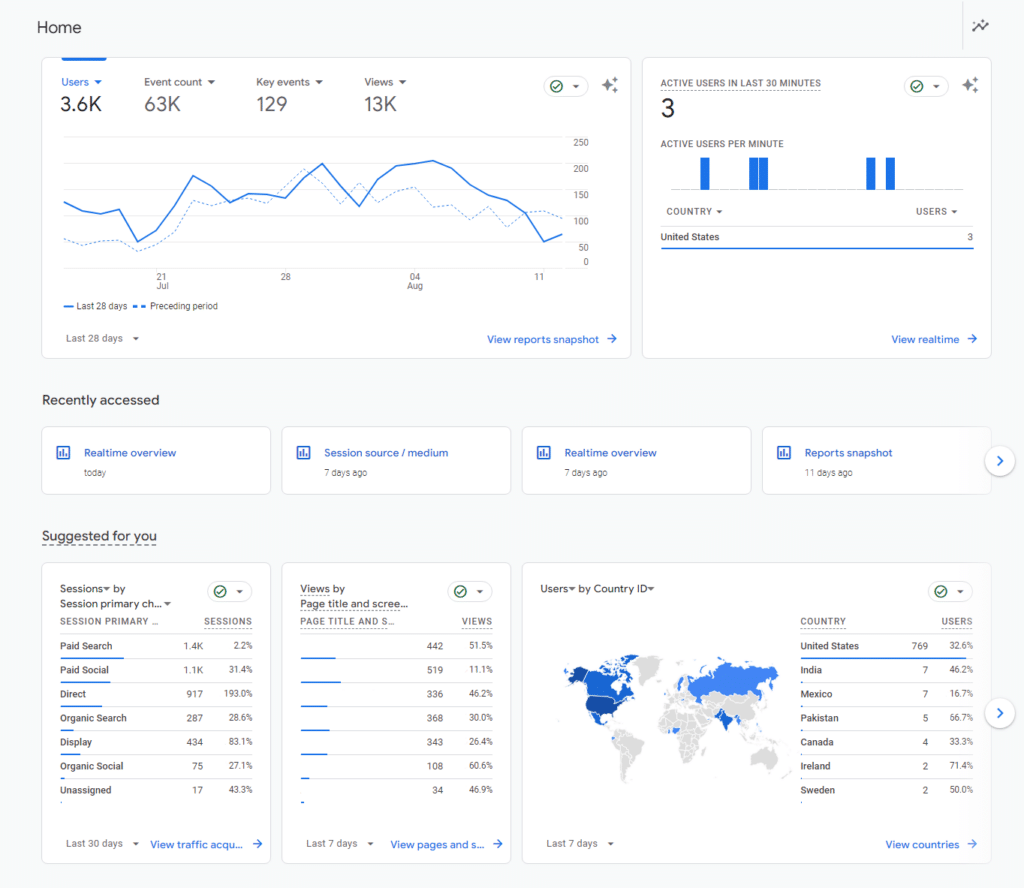
Key Takeaways: Why You Should Be Tracking Data On your Website
In my experience, setting up GA4 or another analytics platform for your home service business is a critical step in optimizing your digital marketing strategy. By following these steps, you can ensure your website is fully equipped to track user interactions, measure performance, and drive more leads and sales. For additional customization, you can also integrate campaign tracking URLs to better understand the effectiveness of your marketing campaigns.